Wolverine Interoperability with Others

Wolverine is the relative newcomer on the scene for asynchronous messaging in the .NET ecosystem. While many Wolverine users are starting in greenfield circumstances, it’s far more likely that the exact shops who would be interested in Wolverine’s messaging support already have a significant amount of existing systems communicating with other messaging infrastructure solutions. And while I absolutely believe in Wolverine, there is likely no world in which it makes sense to completely replace every bit of existing messaging infrastructure all at once. Moreover, it’s also common to have systems built on completely other platforms or 3rd party systems that communicate with message queueing.

All that said, Wolverine obviously needs to have a strong interoperability story to enable its adoption. Other than the interoperability with NServiceBus through Rabbit MQ we needed at my previous company, I quite admittedly skimped a little on that in the original push to 1.0 as I inevitably start triaging user stories to make my self imposed deadline for 1.0 this summer.

In the past couple weeks there were several folks trying to utilize Wolverine to receive messages from external systems using various transports, so it turned into the perfect time to focus on improving Wolverine’s interoperability features in the recent Wolverine 1.7 release.

First, some links for more information:

Feel very free to skip down to the samples below that.

A Little Background

For just a little background, each messaging transport has a little bit different API for shuffling data between systems, but that mostly boils down to message body data and message metadata (headers). Wolverine (and other messaging alternatives) maps the specific messaging API of Rabbit MQ, Azure Service Bus, or AWS SQS into Wolverine’s internal Envelope representation. The message body itself would be deserialized into the actual .NET message type, and the rest of that metadata helps Wolverine perform distributed tracing through correlation identifiers, “know” how to send replies back to the original sender, and to even just know what the incoming message type is. That all works seamlessly when Wolverine is on both sides of the messaging pipe, but when interoperating with a non-Wolverine system you have to override Wolverine’s mapping between its Envelope model and the incoming and outgoing API for the underlying transport.

Fortunately, this mapping is either completely pluggable on an endpoint by endpoint basis, or you can now start with the built in mapping from Wolverine and selectively override a subset of the metadata mappings.

Receive “Just” JSON via Rabbit MQ

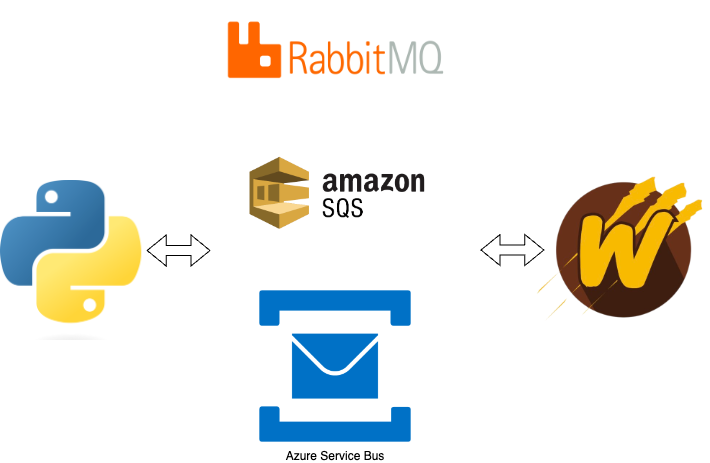
A prospective Wolverine user reached out to us on Discord to tell us about trying to receive pure JSON messages from a service written in Python (hence the image up above). After some internal changes in Wolverine 1.7, you can now receive “just” JSON to a Rabbit MQ queue assuming that that queue will only ever receive one message type by telling Wolverine what the default message type name is like this:

using var host = await Host.CreateDefaultBuilder()
    .UseWolverine((context, opts) =>
    {
        var rabbitMqConnectionString = context.Configuration.GetConnectionString("rabbit");

        opts.UseRabbitMq(rabbitMqConnectionString);

        opts.ListenToRabbitQueue("emails")
            // Tell Wolverine to assume that all messages
            // received at this queue are the SendEmail
            // message type
            .DefaultIncomingMessage<SendEmail>();
    }).StartAsync();

Also see the documentation on Rabbit MQ interoperability.

Interop with AWS SQS

Wolverine has to work with AWS SQS in a much different way than the other transports. Via a pull request in Wolverine 1.7, you can now receive “just” JSON from external systems via AWS SQS like this:

using var host = await Host.CreateDefaultBuilder()
    .UseWolverine(opts =>
    {
        opts.UseAmazonSqsTransport();

        opts.ListenToSqsQueue("incoming").ReceiveRawJsonMessage(
            // Specify the single message type for this queue
            typeof(Message1), 
            
            // Optionally customize System.Text.Json configuration
            o =>
            {
                o.PropertyNamingPolicy = JsonNamingPolicy.CamelCase;
            });
    }).StartAsync();

To send “just” JSON to external systems, use this:

using var host = await Host.CreateDefaultBuilder()
    .UseWolverine(opts =>
    {
        opts.UseAmazonSqsTransport();

        opts.PublishAllMessages().ToSqsQueue("outgoing").SendRawJsonMessage(
            // Specify the single message type for this queue
            typeof(Message1), 
            
            // Optionally customize System.Text.Json configuration
            o =>
            {
                o.PropertyNamingPolicy = JsonNamingPolicy.CamelCase;
            });
    }).StartAsync();

For custom interoperability strategies using AWS SQS, you can create your own implementation of the `ISqsEnvelopeMapper` interface like this one:

public class CustomSqsMapper : ISqsEnvelopeMapper
{
    public string BuildMessageBody(Envelope envelope)
    {
        // Serialized data from the Wolverine message
        return Encoding.Default.GetString(envelope.Data);
    }

    // Specify header values for the SQS message from the Wolverine envelope
    public IEnumerable<KeyValuePair<string, MessageAttributeValue>> ToAttributes(Envelope envelope)
    {
        if (envelope.TenantId.IsNotEmpty())
        {
            yield return new KeyValuePair<string, MessageAttributeValue>("tenant-id", new MessageAttributeValue{StringValue = envelope.TenantId});
        }
    }

    public void ReadEnvelopeData(Envelope envelope, string messageBody, IDictionary<string, MessageAttributeValue> attributes)
    {
        envelope.Data = Encoding.Default.GetBytes(messageBody);

        if (attributes.TryGetValue("tenant-id", out var att))
        {
            envelope.TenantId = att.StringValue;
        }
    }
}

And apply that to Wolverine endpoints like this:

using var host = await Host.CreateDefaultBuilder()
    .UseWolverine(opts =>
    {
        opts.UseAmazonSqsTransport()
            .UseConventionalRouting()

            .ConfigureListeners(l => l.InteropWith(new CustomSqsMapper()))

            .ConfigureSenders(s => s.InteropWith(new CustomSqsMapper()));

    }).StartAsync();

Interop with Azure Service Bus

You can create interoperability with non-Wolverine applications by writing a custom IAzureServiceBusEnvelopeMapper as shown in the following sample:

public class CustomAzureServiceBusMapper : IAzureServiceBusEnvelopeMapper
{
    public void MapEnvelopeToOutgoing(Envelope envelope, ServiceBusMessage outgoing)
    {
        outgoing.Body = new BinaryData(envelope.Data);
        if (envelope.DeliverWithin != null)
        {
            outgoing.TimeToLive = envelope.DeliverWithin.Value;
        }
    }

    public void MapIncomingToEnvelope(Envelope envelope, ServiceBusReceivedMessage incoming)
    {
        envelope.Data = incoming.Body.ToArray();
        
        // You will have to help Wolverine out by either telling Wolverine
        // what the message type is, or by reading the actual message object,
        // or by telling Wolverine separately what the default message type
        // is for a listening endpoint
        envelope.MessageType = typeof(Message1).ToMessageTypeName();
    }

    public IEnumerable<string> AllHeaders()
    {
        yield break;
    }
}

and apply that to various endpoints like this:

using var host = await Host.CreateDefaultBuilder()
    .UseWolverine(opts =>
    {
        opts.UseAzureServiceBus("some connection string")
            .UseConventionalRouting()

            .ConfigureListeners(l => l.InteropWith(new CustomAzureServiceBusMapper()))

            .ConfigureSenders(s => s.InteropWith(new CustomAzureServiceBusMapper()));
    }).StartAsync();

Interop with NServiceBus via Rabbit MQ

The original production usage of Wolverine was replacing NServiceBus for one service within a large constellation of services that all communicated asynchronously with Rabbit MQ. Unsurprisingly, Wolverine launched with a strong, fully functional interoperability between NServiceBus systems and Wolverine systems through Rabbit MQ with this usage taken from a test project within the Wolverine codebase:

Wolverine = await Host.CreateDefaultBuilder().UseWolverine(opts =>
{
    opts.UseRabbitMq()
        .AutoProvision().AutoPurgeOnStartup()
        .BindExchange("wolverine").ToQueue("wolverine")
        .BindExchange("nsb").ToQueue("nsb")
        .BindExchange("NServiceBusRabbitMqService:ResponseMessage").ToQueue("wolverine");

    opts.PublishAllMessages().ToRabbitExchange("nsb")

        // Tell Wolverine to make this endpoint send messages out in a format
        // for NServiceBus
        .UseNServiceBusInterop();

    opts.ListenToRabbitQueue("wolverine")
        .UseNServiceBusInterop()
        

        .UseForReplies();
    
    // This facilitates messaging from NServiceBus (or MassTransit) sending as interface
    // types, whereas Wolverine only wants to deal with concrete types
    opts.Policies.RegisterInteropMessageAssembly(typeof(IInterfaceMessage).Assembly);
}).StartAsync();

Interop with MassTransit via Rabbit MQ

A little less battle tested — and much weirder under the covers — is a similar interoperability recipe for talking to MassTransit applications via Rabbit MQ:

Wolverine = await Host.CreateDefaultBuilder().UseWolverine(opts =>
{
    opts.ApplicationAssembly = GetType().Assembly;

    opts.UseRabbitMq()
        .CustomizeDeadLetterQueueing(new DeadLetterQueue("errors", DeadLetterQueueMode.InteropFriendly))
        .AutoProvision().AutoPurgeOnStartup()
        .BindExchange("wolverine").ToQueue("wolverine")
        .BindExchange("masstransit").ToQueue("masstransit");

    opts.PublishAllMessages().ToRabbitExchange("masstransit")

        // Tell Wolverine to make this endpoint send messages out in a format
        // for MassTransit
        .UseMassTransitInterop();

    opts.ListenToRabbitQueue("wolverine")

        // Tell Wolverine to make this endpoint interoperable with MassTransit
        .UseMassTransitInterop(mt =>
        {
            // optionally customize the inner JSON serialization
        })
        .DefaultIncomingMessage<ResponseMessage>().UseForReplies();
}).StartAsync();

Wolverine 1.7 is a community affair!

Look for details on official support plans for Marten and/or Wolverine and the rest of the “Critter Stack” from JasperFx Software early next week. If you’re looking at Wolverine and wondering if it’s going to be a viable choice in the long run, just know we’re trying very hard to make it so.

Wolverine had a pretty significant 1.7.0 release on Friday. What’s most encouraging to me was how many community contributions were in this one including pull requests, issues where community members took a lot of time to create actionable reproduction steps, and suggestions from our Wolverine Discord room. This always misses folks, but thank you goes to:

This issue addressed several open bugs, but beyond that the high points were:

  • Multi-tenancy support from the HTTP layer down as I blogged about yesterday
  • A much better interoperability story for Wolverine and non-Wolverine applications using Rabbit MQ, AWS SQS, or Azure Service Bus. More on this later this week
  • A lot more diagnostics and explanatory comments in the generated code to unravel the “magic” within Wolverine and the message handler / http endpoint method discovery logic. Much more on this in a later blog post this week
  • Much more control over the Open Telemetry and message logging that is published by Wolverine to tone down the unnecessary noise that might be happening to some users today. Definitely more on that later this week

I’m working with a couple clients who are using Wolverine, and I can’t say that there are zero problems, but overall I’m very happy with how Wolverine is being received and how it’s working out in real applications so far.

Wolverine Expands its Multi-Tenancy Story to HTTP

As folks read more about Wolverine and its multi-tenancy support, you may quickly notice that we’ve clearly focused much more on the Marten integration than we have with EF Core so far. You’ll also notice that Wolverine today does not yet have direct support for Finbuckle. At some point in the future I think that Wolverine will provide some Finbuckle integration into Wolverine’s runtime model and will probably use Finbuckle’s EF Core support to provide end to end multi-tenancy with EF Core. For right now though, I think that Marten actually has a much stronger story out of the box for multi-tenancy than EF Core does anyway.

Let’s say that you’re tasked with building an online SaaS solution where the same application service is going to be used by completely different sets of users from different client organizations. It’s going to be important to segregate data between these different client organizations so the various users for each client are only viewing and modifying data for their organization. Maybe you have to go all the way to creating a separate database for each client organization or “tenant,” or maybe you’re using programmatic ways to keep data segregated through your persistence tooling’s capabilities like Marten’s “conjoined tenancy” model. Having one shared system being able to serve different populations of users while keeping all their data correctly segregated is referred to generally as “multi-tenancy” in the software development world.

As an example, let’s consider the sample MultiTenantedTodoService project from the Wolverine codebase. That project is utilizing Marten with a database per tenant strategy using this project configuration for Marten:

var connectionString = "Host=localhost;Port=5433;Database=postgres;Username=postgres;password=postgres";

// Adding Marten for persistence
builder.Services.AddMarten(m =>
    {
        // With multi-tenancy through a database per tenant
        m.MultiTenantedDatabases(tenancy =>
        {
            // You would probably be pulling the connection strings out of configuration,
            // but it's late in the afternoon and I'm being lazy building out this sample!
            tenancy.AddSingleTenantDatabase("Host=localhost;Port=5433;Database=tenant1;Username=postgres;password=postgres", "tenant1");
            tenancy.AddSingleTenantDatabase("Host=localhost;Port=5433;Database=tenant2;Username=postgres;password=postgres", "tenant2");
            tenancy.AddSingleTenantDatabase("Host=localhost;Port=5433;Database=tenant3;Username=postgres;password=postgres", "tenant3");
        });
        
        m.DatabaseSchemaName = "mttodo";
    })
    .IntegrateWithWolverine(masterDatabaseConnectionString:connectionString);

Wolverine has had a strong story for multi-tenancy solutions within its message handling since its 1.0 release this summer (more on that later). I’m not showing this capability in this post, but Wolverine (with Marten) is able to create and use separate transactional outbox functionality for each and every separate tenant database. To the best of my knowledge, Wolverine is the only tool in the .NET world with that capability.

What had been missing had been direct support within Wolverine.HTTP handlers meaning that designing a simple HTTP endpoint that created a new Todo meant building an HTTP endpoint that picked out the tenant id from the route like so:

    [WolverinePost("/todoitems/{tenant}")]
    public static async Task<IResult> Create(string tenant, CreateTodo command, IMessageBus bus)
    {
        // At the 1.0 release, you would have to use Wolverine as a mediator
        // to get the full multi-tenancy feature set.
        
        // That hopefully changes in 1.1
        var created = await bus.InvokeForTenantAsync<TodoCreated>(tenant, command);

        return Results.Created($"/todoitems/{tenant}/{created.Id}", created);
    }

and immediately delegated to an inner Wolverine message handler through the InvokeForTenantAsync() usage shown up above. That handler code is simpler because Wolverine is handling all the multi-tenancy mechanics and looked like this:

    public static TodoCreated Handle(CreateTodo command, IDocumentSession session)
    {
        var todo = new Todo { Name = command.Name };
        session.Store(todo);

        return new TodoCreated(todo.Id);
    }

Alright, not too awful, and very reminiscent of systems that use the MediatR library within MVC Core controllers. However, it’s more moving parts and more code ceremony than I was hoping for out of Wolverine.

Likewise, to create a GET endpoint that returns all the completed Todo documents for the current tenant, maybe you did something like this that explicitly opened a Marten session for the tenant id detected from the request:

    [WolverineGet("/todoitems/{tenant}/complete")]
    public static Task<IReadOnlyList<Todo>> GetComplete(string tenant, IDocumentStore store)
    {
        using var session = store.QuerySession(tenant);
        return session.Query<Todo>().Where(x => x.IsComplete).ToListAsync();
    }

Again, not too much code, but there’s some repetitive code around opening the right session for the right tenant that would be easy for a developer to forget and maybe possible to sneak by testing some times. Also, I had to explicitly dispose the Marten query session — and failing to do so can easily lead to orphaned database connections and all kinds of hurting within your system at runtime. Don’t laugh or blow that off, because that’s happened to the unwary.

Enter Wolverine 1.7.0 on this past Friday. Now Wolverine.HTTP got stretched to include tenant id detection and “know” how to pass that tenant id along to the Marten sessions created within HTTP endpoints.

With Wolverine.HTTP 1.7, I opened the MultiTenantedTodoService Program file again and added this configuration:

// Let's add in Wolverine HTTP endpoints to the routing tree
app.MapWolverineEndpoints(opts =>
{
    // Letting Wolverine HTTP automatically detect the tenant id!
    opts.TenantId.IsRouteArgumentNamed("tenant");
    
    // Assert that the tenant id was successfully detected,
    // or pull the rip cord on the request and return a 
    // 400 w/ ProblemDetails
    opts.TenantId.AssertExists();
});

Using Wolverine.HTTP’s new tenant id detection capability, I’ve told Wolverine to pluck the tenant id out of an expected route argument named “tenant.” With its Marten integration, Wolverine is able to pass sessions into our HTTP endpoint methods that point to the correct tenant database.

Don’t worry, there are plenty of other options for tenant id detection than this simple mechanism I used for testing and the simple demonstration here.

Revisiting the endpoint for fetching all the completed Todo documents for a client, that code reduces down to this:

    [WolverineGet("/todoitems/{tenant}/complete")]
    public static Task<IReadOnlyList<Todo>> GetComplete(IQuerySession session) 
        => session
            .Query<Todo>()
            .Where(x => x.IsComplete)
            .ToListAsync();

Better yet, let’s revisit the endpoint for creating a new Todo and we’re now able to collapse this down to just a single endpoint method:

    [WolverinePost("/todoitems/{tenant}")]
    public static CreationResponse<TodoCreated> Create(
        // Only need this to express the location of the newly created
        // Todo object
        string tenant, 
        CreateTodo command, 
        IDocumentSession session)
    {
        var todo = new Todo { Name = command.Name };
        
        // Marten itself sets the Todo.Id identity
        // in this call
        session.Store(todo); 

        // New syntax in Wolverine.HTTP 1.7
        // Helps Wolverine 
        return CreationResponse.For(new TodoCreated(todo.Id), $"/todoitems/{tenant}/{todo.Id}");
    }

Notice that we really didn’t do anything with the tenant argument except as a helper to build the Url for a newly created Todo. Wolverine & Marten together took care of everything else for us creating the correct session for the correct tenant database.

Summary

The new Wolverine.HTTP multi-tenancy capability is going to allow users to write simpler code and less error prone code for teams needing multi-tenanted persistence.

Using Alba to Test ASP.Net Core Web Services

Hey, JasperFx Software is more than just some silly named open source frameworks. We’re also deeply experienced in test driven development, designing for testability, and making test automation work without driving into the ditch with over dependence on slow, brittle Selenium testing. Hit us up about what we could do to help you be more successful in your own test automation or TDD efforts.

I have been working furiously on getting an incremental Wolverine release out this week, with one of the new shiny features being end to end support for multi-tenancy (the work in progress GitHub issue is here) through Wolverine.Http endpoints. I hit a point today where I have to admit that I can’t finish that work today, but did see the potential for a blog post on the Alba library (also part of JasperFx’s OSS offerings) and how I was using Alba today to write integration tests for this new functionality, show how the sausage is being made, and even work in a test-first manner.

To put the desired functionality in context, let’s say that we’re building a “Todo” web service using Marten for persistence. Moreover, we’re expecting this system to have a massive number of users and want to be sure to isolate data between customers, so we plan on using Marten’s support for using a separate database for each tenant (think user organization in this case). Within that “Todo” system, let’s say that we’ve got a very simple web service endpoint to just serve up all the completed Todo documents for the current tenant like this one:

[WolverineGet("/todoitems/{tenant}/complete")]
public static Task<IReadOnlyList<Todo>> GetComplete(IQuerySession session) 
    => session
        .Query<Todo>()
        .Where(x => x.IsComplete)
        .ToListAsync();

Now, you’ll notice that there is a route argument named “tenant” that isn’t consumed at all by this web api endpoint. What I want Wolverine to do in this case is to infer that the value of that “tenant” value within the route is the current tenant id for the request, and quietly select the correct Marten tenant database for me without me having to write a lot of repetitive code.

Just a note, all of this is work in progress and I haven’t even pushed the code at the time of writing this post. Soon. Maybe tomorrow.

Stepping into the bootstrapping for this web service, I’m going to add these new lines of code to the Todo web service’s Program file to teach Wolverine.HTTP how to handle multi-tenancy detection for me:

// Let's add in Wolverine HTTP endpoints to the routing tree
app.MapWolverineEndpoints(opts =>
{
    // Letting Wolverine HTTP automatically detect the tenant id!
    opts.TenantId.IsRouteArgumentNamed("tenant");
    
    // Assert that the tenant id was successfully detected,
    // or pull the rip cord on the request and return a 
    // 400 w/ ProblemDetails
    opts.TenantId.AssertExists();
});

So that’s some of the desired, built in multi-tenancy features going into Wolverine.HTTP 1.7 some time soon. Back to the actual construction of these new features and how I used Alba this morning to drive the coding.

I started by asking around on social media about what other folks used as strategies to detect the tenant id in ASP.Net Core multi-tenancy, and came up with this list (plus a few other options):

  • Use a custom request header
  • Use a named route argument
  • Use a named query string value (I hate using the query string myself, but like cockroaches or scorpions in our Central Texas house, they always sneak in somehow)
  • Use an expected Claim on the ClaimsPrincipal
  • Mix and match the strategies above because you’re inevitably retrofitting this to an existing system
  • Use sub domain names (I’m arbitrarily skipping this one for now just because it was going to be harder to test and I’m pressed for time this week)

Once I saw a little bit of consensus on the most common strategies (and thank you to everyone who responded to me today), I jotted down some tasks in GitHub-flavored markdown (I *love* this feature) on what the configuration API would look like and my guesses for development tasks:

- [x] `WolverineHttpOptions.TenantId.IsRouteArgumentNamed("foo")` -- creates a policy
- [ ] `[TenantId("route arg")]`, or make `[TenantId]` on a route parameter for one offs. Will need to throw if not a route argument
- [x] `WolverineHttpOptions.TenantId.IsQueryStringValue("key") -- creates policy
- [x] `WolverineHttpOptions.TenantId.IsRequestHeaderValue("key") -- creates policy
- [x] `WolverineHttpOptions.TenantId.IsClaimNamed("key") -- creates policy
- [ ] New way to add custom middleware that's first inline
- [ ] Documentation on custom strategies
- [ ] Way to register the "preprocess context" middleware methods
- [x] Middleware or policy that blows it up with no tenant id detected. Use ProblemDetails
- [ ] Need an attribute to opt into tenant id is required, or tenant id is NOT required on certain endpoints

Knowing that I was going to need to quickly stand up different configurations of a test web service’s IHost, I started with this skeleton that I hoped would make the test setup relatively easy:

public class multi_tenancy_detection_and_integration : IAsyncDisposable, IDisposable
{
    private IAlbaHost theHost;

    public void Dispose()
    {
        theHost.Dispose();
    }

    // The configuration of the Wolverine.HTTP endpoints is the only variable
    // part of the test, so isolate all this test setup noise here so
    // each test can more clearly communicate the relationship between
    // Wolverine configuration and the desired behavior
    protected async Task configure(Action<WolverineHttpOptions> configure)
    {
        var builder = WebApplication.CreateBuilder(Array.Empty<string>());
        builder.Services.AddScoped<IUserService, UserService>();

        // Haven't gotten around to it yet, but there'll be some end to
        // end tests in a bit from the ASP.Net request all the way down
        // to the underlying tenant databases
        builder.Services.AddMarten(Servers.PostgresConnectionString)
            .IntegrateWithWolverine();
        
        // Defaults are good enough here
        builder.Host.UseWolverine();
        
        // Setting up Alba stubbed authentication so that we can fake
        // out ClaimsPrincipal data on requests later
        var securityStub = new AuthenticationStub()
            .With("foo", "bar")
            .With(JwtRegisteredClaimNames.Email, "guy@company.com")
            .WithName("jeremy");
        
        // Spinning up a test application using Alba 
        theHost = await AlbaHost.For(builder, app =>
        {
            app.MapWolverineEndpoints(configure);
        }, securityStub);
    }

    public async ValueTask DisposeAsync()
    {
        // Hey, this is important!
        // Make sure you clean up after your tests
        // to make the subsequent tests run cleanly
        await theHost.StopAsync();
    }

Now, the intermediate step of tenant detection even before Marten itself gets involved is to analyze the HttpContext for the current request, try to derive the tenant id, then set the MessageContext.TenantId in Wolverine for this current request — which Wolverine’s Marten integration will use a little later to create a Marten session pointing at the correct database for that tenant.

Just to measure the tenant id detection — because that’s what I want to build and test first before even trying to put everything together with a real database too — I built these two simple GET endpoints with Wolverine.HTTP:

public static class TenantedEndpoints
{
    [WolverineGet("/tenant/route/{tenant}")]
    public static string GetTenantIdFromRoute(IMessageBus bus)
    {
        return bus.TenantId;
    }

    [WolverineGet("/tenant")]
    public static string GetTenantIdFromWhatever(IMessageBus bus)
    {
        return bus.TenantId;
    }
}

That folks is the scintillating code that brings droves of readership to my blog!

Alright, so now I’ve got some support code for the “Arrange” and “Assert” part of my Arrange/Act/Assert workflow. To finally jump into a real test, I started with detecting the tenant id with a named route pattern using Alba with this code:

    [Fact]
    public async Task get_the_tenant_id_from_route_value()
    {
        // Set up a new application with the desired configuration
        await configure(opts => opts.TenantId.IsRouteArgumentNamed("tenant"));
        
        // Run a web request end to end in memory
        var result = await theHost.Scenario(x => x.Get.Url("/tenant/route/chartreuse"));
        
        // Make sure it worked!
        // ZZ Top FTW! https://www.youtube.com/watch?v=uTjgZEapJb8
        result.ReadAsText().ShouldBe("chartreuse");
    }

The code itself is a little wonky, but I had that quickly working end to end. I next proceeded to the query string strategy like this:

    [Fact]
    public async Task get_the_tenant_id_from_the_query_string()
    {
        await configure(opts => opts.TenantId.IsQueryStringValue("t"));
        
        var result = await theHost.Scenario(x => x.Get.Url("/tenant?t=bar"));
        
        result.ReadAsText().ShouldBe("bar");
    }

Hopefully you can see from the two tests above how that configure() method already helped me quickly write the next test. Sometimes — but not always so be careful with this — the best thing you can do is to first invest in a test harness that makes subsequent tests be more declarative, quicker to write mechanically, and easier to read later.

Next, let’s go to the request header strategy test:

    [Fact]
    public async Task get_the_tenant_id_from_request_header()
    {
        await configure(opts => opts.TenantId.IsRequestHeaderValue("tenant"));
        
        var result = await theHost.Scenario(x =>
        {
            x.Get.Url("/tenant");
            
            // Alba is helping set up the request header
            // for me here
            x.WithRequestHeader("tenant", "green");
        });
        
        result.ReadAsText().ShouldBe("green");
    }

Easy enough, and hopefully you see how Alba helped me get the preconditions into the request quickly in that test. Now, let’s go for a little more complicated test where I first ran into a little trouble and work with the Claim strategy:

    [Fact]
    public async Task get_the_tenant_id_from_a_claim()
    {
        await configure(opts => opts.TenantId.IsClaimTypeNamed("tenant"));
        
        var result = await theHost.Scenario(x =>
        {
            x.Get.Url("/tenant");
            
            // Add a Claim to *only* this request
            x.WithClaim(new Claim("tenant", "blue"));
        });
        
        result.ReadAsText().ShouldBe("blue");
    }

I hit a little friction at first because I didn’t have Alba set up exactly right at first, but since Alba runs your application code completely within process, it was very quick to step right into the code and figure out why the code wasn’t working at first (I’d forgotten to set up the SecurityStub shown above). Refreshing my memory on how Alba’s Security Extensions worked, I was able to get going again. Arguably, Alba’s ability to fake out or even work with your application’s security in tests is its best features.

So that’s been a lot of “happy path” tests, so now let’s break things by specifying Wolverine’s new behavior to validate that a request has a valid tenant id with these two new tests. First, a happy path:

    [Fact]
    public async Task require_tenant_id_happy_path()
    {
        await configure(opts =>
        {
            opts.TenantId.IsQueryStringValue("tenant");
            opts.TenantId.AssertExists();
        });

        // Got a 200? All good!
        await theHost.Scenario(x =>
        {
            x.Get.Url("/tenant?tenant=green");
        });
    }

Note that Alba would cause a test failure if the web request did not return a 200 status code.

And to lock down the binary behavior, here’s the “sad path” where Wolverine should be returning a 400 status code with ProblemDetails data:

    [Fact]
    public async Task require_tenant_id_sad_path()
    {
        await configure(opts =>
        {
            opts.TenantId.IsQueryStringValue("tenant");
            opts.TenantId.AssertExists();
        });

        var results = await theHost.Scenario(x =>
        {
            x.Get.Url("/tenant");
            
            // Tell Alba we expect a non-200 response
            x.StatusCodeShouldBe(400);
        });

        // Alba's helpers to deserialize JSON responses
        // to a strong typed object for easy
        // assertions
        var details = results.ReadAsJson<ProblemDetails>();
        
        // I like to refer to constants in test assertions sometimes
        // so that you can tweak error messages later w/o breaking
        // automated tests. And inevitably regret it when I 
        // don't do this
        details.Detail.ShouldBe(TenantIdDetection
            .NoMandatoryTenantIdCouldBeDetectedForThisHttpRequest);
    }

To be honest, it took me a few minutes to get the test above to pass because of some internal middleware mechanics I didn’t expect. As usual. All the same though, Alba helped me drive the code through “outside in” tests that ran quickly so I could iterate rapidly.

As always, I use Jeremy’s Only Law of Testing to decide on a mix of solitary or socialable tests in any particular scenario.

A bit about Alba

Alba itself is a descendant of some very old test helper code in FubuMVC, then was ported to OWIN (RIP, but I don’t miss you), then to early ASP.Net Core, and finally rebuilt as a helper around ASP.Net Core’s. built in TestServer and WebApplicationFactory. Alba has been continuously used for well over a decade now. If you’re looking for selling points for Alba, I’d say:

  • Alba makes your integration tests more declarative
  • There are quite a few helpers for common repetitive tasks in integration tests like reading JSON data with the application’s built in serialization
  • Simplifies test setup
  • It runs completely in memory where you can quickly spin up your application and jump right into debugging when necessary
  • Testing web services with Alba is much more efficient and faster than trying to do the same thing through inevitably slow, brittle, and laborious Selenium/Playwright/Cypress testing

Notes on Teaching Test Driven Development

JasperFx Software has several decades worth of experience with Test Driven Development, developer focused testing, and test automation in general. We’re more than happy to engage with potential clients who are interested in improving their outcomes with TDD or automated testing!

Crap I feel old having typed out that previous sentence.

I’m going through an interesting exercise right now helping a JasperFx client learn how to apply Test Driven Development and developer testing from scratch. The developer in question is very inquisitive and trying hard to understand how best to apply testing and even a little TDD, and that’s keeping me on my toes. Since I’m getting to see things fresh from his point of view, I’m trying to keep notes on what we’ve been discussing, my thoughts on those questions, and the suggestions I’ve been making as we go.

The first things I should have stressed was that the purpose of your automated test suite is to:

  1. Help you know when it’s safe to ship code — not “your code is perfect” but “your code is most likely ready to ship.” That last distinction matters. It’s not always economically viable to have perfect 100% coverage of your code, but you can hopefully do enough testing to minimize the risk of defects getting past your test coverage.
  2. Provide an effective feedback loop that helps you to modify code. And by “effective,” I mean that it’s fast enough that it doesn’t slow you down, tells you useful things about the state of your code, and it’s stable or reliable enough to be trusted.

Now, switching to Test Driven Development (TDD) itself, I try to stress that TDD is primarily a low level design technique and an important feedback loop for coding. While I’m not too concerned about whether or not the test is written first before the actual code in all cases, I do believe you should consider how you’ll test your code upfront as an input to how the code is going to be written in the first place.

Think about Individual Responsibilities

What I absolutely did tell my client was to try to approach any bigger development task by first trying to pick out the individual tasks or responsibilities within the larger user story. In the first case we were retrofitting tests to, it was a pretty typical web api endpoint that:

  • Tried to locate some related entities in the database based on the request
  • Validated whether the requested action was valid based on the existence and state of the entities
  • On the happy path, make a change to the entity state
  • Persist the changes to the underlying database

In the case above, we started by focusing on that validation logic by isolating it into its own little function where we could easily “push” in inputs and do simple assertions against the expected state. Together, we built little unit tests that exercised all the unique pathways in the validation including the “happy path”.

Even this little getting started exercise potentially leads to several other topics:

  • The advantage of using pure functions for testable code whenever possible
  • Purposely designing for testability (as I wrote about way back in 2008!)
  • In our case, I had us break the code apart so we could start in a “bottom up” approach where we coded and tested individual tasks before assembling everything together, versus a top down approach where you try to code the governing workflow of a user story first in order to help define the new API calls for the lower level tasks to build after. I did stress that the bottom up or top down approach should be chosen on a case by case basis.

When we were happy with those first unit tests, we moved on to integration tests that tested from the HTTP layer all the way through the database. Since we had dealt with the different permutations of validation earlier in unit tests, I had us just write two tests, one for the happy path that should have made changes in the database and another “sad path” test where validation problems should have been detected, an HTTP status code of 400 was returned denoting a bad request, and no database changes were made. These two relatively small tests led to a wide range of further discussions:

  • Whither unit or integration testing? That’s a small book all by itself, or at least a long blog post like Jeremy’s Only Rule of Testing.
  • I did stress that we weren’t even going to try to test every permutation of the validation logic within the integration test harnesses. I tried to say that we were trying to create just enough tests that worked through the execution pathways of that web api method that we could feel confident to ship that code if all the tests were passing
  • Watch how much time you’re needing to spend using debugging tools. If you or your team is finding yourself needing to frequently use debuggers to diagnose test failures or defects, that’s often a sign that you should be writing more granular unit tests for your code
  • Again with the theme that it’s actually inefficient to be using your debugger too much, I stressed the importance of trying to push through smaller unit tests on coding tasks before you even try to run end to end tests. That’s all about trying to reduce the number of variables or surface area in your code that could be causing integration test failures
  • And to not let the debugging topic go quite yet, we did have to jump into a debugger to fix a failing integration test. We just happened to be using the Alba (one of the JasperFx OSS libraries!) library to help us test our web api. One of the huge advantages of this approach is that our web application is running in the same process as the test harness, so it’s very quick to jump right into the debugger by merely re-running the failing test. I can’t stress enough how valuable this is for faster feedback cycles when it inevitably comes time to debug through breaking code as opposed to trying to troubleshoot failing end to end tests running through user interfaces in separate processes (i.e. Selenium based testing).
  • Should unit tests and integration tests against the same code be in the same file or even in the same project? My take was just to pay attention to his feedback cycle. If he felt like his test suite ran “fast enough” — and this is purely subjective — keep it simple and put everything together. If the integration tests became uncomfortably slow, then it might be valuable to separate the two poles of tests into the “fast” and “slow” test suites
  • Even in this one test, we had to set up expected inputs through the actual database to run end to end. In our case, the data is all identified through globally unique identifiers, so we could add all new data inputs without worrying about needing to teardown or rebuild system data before the test executed. We just barely started a discussion about my recommendations for test data setup.

As an aside, JasperFx Software strongly feels that overusing Selenium, Playwright, or Cypress.io to primarily automate testing through browser manipulation is potentially very inefficient and ineffective compared to more balanced approaches that rely on smaller and faster, intermediate level integration tests like the Alba-based integration testing my client and I were doing above.

“Quick Twitch” Working Style

In the end, you want to be quick enough with your testing and coding mechanics that your progress is only limited by how fast you can think. Both my client and I use JetBrains Rider as our primary IDE, so I recommended:

  • Get familiar with the keyboard shortcuts to run test, re-run the last test, or re-run the last test in the debugger so that he could mechanically execute the exact test he’s working on faster without fumbling around with a mouse. This is all about just being able to work as fast as you can think through problems. Other people will choose to use continuous test runners that automatically re-run your tests when file changes are detected. The point either way is just to reduce your mechanical steps and tighten up the feedback loop. Not everything is a hugely deep philosophical subject:-)
  • Invest a little time in micro-code generation tooling like Rider’s Live Template feature to help build repetitive code structures around unit tests. Again, the point of this is just to be able to work at the “speed of thought” and not burn up any gray cells dealing with mundane, repetitive code or mouse clicking

Integrating Marten Projections and IoC Services

Marten 6.2 (see the release notes here) dropped today with a long requested enhancement that makes it easier to consume services from your application’s IoC container within your Marten event projections.

Thanks to Andy Pook for providing the idea for the approach and some of the code for this feature.

As a sample, let’s say that we’re building some kind of system to track road trips, and we’re building a mobile user interface app that users can use to check in and say “I’m here, at this exact GPS location,” but we want our back end to track and show their current location by place name. To that end, let’s say that we’ve got this service with a couple value object types to translate GPS coordinates to the closest place name:

public record LocationDescription(string City, string County, string State);

public record Coordinates(double Latitude, double Longitude);

public interface IGeoLocatorService
{
    Task<LocationDescription> DetermineLocationAsync(Coordinates coordinates);
}

And now, we’d like to ship an aggregated view of a current trip to the client that looks like this:

public class Trip
{
    public Trip(LocationDescription startingLocation, DateTimeOffset started)
    {
        StartingLocation = startingLocation;
        Started = started;
    }

    public Guid Id { get; set; }

    public DateTimeOffset Started { get; }
    public LocationDescription StartingLocation { get; }
    public LocationDescription? CurrentLocation { get; set; }
    public DateTimeOffset? ArrivedAt { get; set; }
}

And we also have some event types for our trip tracking system for starting a new trip, and arriving at a new location within the trip:

public record Started(Coordinates Coordinates);
public record Arrived(Coordinates Coordinates);

To connect the dots, and go between the raw GPS coordinates reported in our captured events and somehow convert that to place names in our Trip aggregate, we need to invoke our IGeoLocatorService within the projection process. The following projection class does exactly that:

public class TripProjection: CustomProjection<Trip, Guid>
{
    private readonly IGeoLocatorService _geoLocatorService;

    // Notice that we're injecting the geoLocatorService
    // and that's okay, because this TripProjection object will
    // be built by the application's IoC container
    public TripProjection(IGeoLocatorService geoLocatorService)
    {
        _geoLocatorService = geoLocatorService;

        // Making the Trip be built per event stream
        AggregateByStream();
    }

    public override async ValueTask ApplyChangesAsync(
        DocumentSessionBase session, 
        EventSlice<Trip, Guid> slice, 
        CancellationToken cancellation,
        ProjectionLifecycle lifecycle = ProjectionLifecycle.Inline)
    {
        foreach (var @event in slice.Events())
        {
            if (@event is IEvent<Started> s)
            {
                var location = await _geoLocatorService.DetermineLocationAsync(s.Data.Coordinates);
                slice.Aggregate = new Trip(location, s.Timestamp);
            }
            else if (@event.Data is Arrived a)
            {
                slice.Aggregate!.CurrentLocation = await _geoLocatorService.DetermineLocationAsync(a.Coordinates);
            }
        }

        if (slice.Aggregate != null)
        {
            session.Store(slice.Aggregate);
        }
    }
}

Finally, we need to register our new projection with Marten inside our application in a such a way that Marten can ultimately build the actual TripProjection object through our application’s underlying IoC container. That’s done with the new AddProjectionWithServices<T>() method used in the sample code below:

using var host = await Host.CreateDefaultBuilder()
    .ConfigureServices(services =>
    {
        services.AddMarten("some connection string")

            // Notice that this is chained behind AddMarten()
            .AddProjectionWithServices<TripProjection>(
                // The Marten projection lifecycle
                ProjectionLifecycle.Live,

                // And the IoC lifetime
                ServiceLifetime.Singleton);

    }).StartAsync();

In this particular case, I’m assuming that the IGeoLocationService itself is a singleton scoped within the IoC container, so I tell Marten the projection itself can have a singleton lifetime and only be resolved just once at application bootstrapping.

If you need to use scoped or transient (but just note that Marten is going to treat these lifetimes as the same thing in its own logic) services in the projection, you can call the same method with ServiceLifetime.Scoped. When you do that, Marten is actually adding a proxy IProjection to itself that uses scoped containers to create and delegate to your actual IProjection every time it’s used. You would need to do this for instance if you were using DbContext objects from EF Core in your projections.

There are some limitations to this feature in that it will not work with any kind of built in projection type that relies on code generation, so no Single/MultiStreamProjection or EventProjection types with that usage. You’ll have to revert to custom IProjection types or use the CustomAggregation<T, TId> type as a base class like I did in this sample.

Scheduled or Delayed Messages in Wolverine

Wolverine has first class support for delayed or scheduled message delivery. While I don’t think I’d recommend using Wolverine as a one for one replacement for a Hangfire or Quartz.Net, Wolverine’s functionality is great for:

  • Scheduling or delaying message retries on failures where you want the message retried, but definitely want that message out of the way of any subsequent messages in a queue
  • Enforcing “timeout” conditions for any kind of long running workflow
  • Explicit scheduling from within message handlers

Mechanically, you can publish a message with a delayed message delivery with Wolverine’s main IMessageBus entry point with this extension method:

public async Task schedule_send(IMessageContext context, Guid issueId)
{
    var timeout = new WarnIfIssueIsStale
    {
        IssueId = issueId
    };

    // Process the issue timeout logic 3 days from now
    await context.ScheduleAsync(timeout, 3.Days());

    // The code above is short hand for this:
    await context.PublishAsync(timeout, new DeliveryOptions
    {
        ScheduleDelay = 3.Days()
    });
}

Or using an absolute time with this overload of the same extension method:

public async Task schedule_send_at_5_tomorrow_afternoon(IMessageContext context, Guid issueId)
{
    var timeout = new WarnIfIssueIsStale
    {
        IssueId = issueId
    };

    var time = DateTime.Today.AddDays(1).AddHours(17);

    // Process the issue timeout at 5PM tomorrow
    // Do note that Wolverine quietly converts this
    // to universal time in storage
    await context.ScheduleAsync(timeout, time);
}

Now, Wolverine tries really hard to enable you to use pure functions for as many message handlers as possible, so there’s of course an option to schedule message delivery while still using cascading messages with the DelayedFor() and ScheduledAt() extension methods shown below:

public static IEnumerable<object> Consume(Incoming incoming)
{
    // Delay the message delivery by 10 minutes
    yield return new Message1().DelayedFor(10.Minutes());
    
    // Schedule the message delivery for a certain time
    yield return new Message2().ScheduledAt(new DateTimeOffset(DateTime.Today.AddDays(2)));
}

Lastly, there’s a special base class called TimeoutMessage that your message types can extend to add scheduling logic directly to the message itself for easy usage as a cascaded message. Here’s an example message type:

// This message will always be scheduled to be delivered after
// a one minute delay
public record OrderTimeout(string Id) : TimeoutMessage(1.Minutes());

Which is used within this sample saga implementation:

// This method would be called when a StartOrder message arrives
// to start a new Order
public static (Order, OrderTimeout) Start(StartOrder order, ILogger<Order> logger)
{
    logger.LogInformation("Got a new order with id {Id}", order.OrderId);

    // creating a timeout message for the saga
    return (new Order{Id = order.OrderId}, new OrderTimeout(order.OrderId));
}

How does it work?

The actual mechanics for how Wolverine is doing the scheduled delivery are determined by the destination endpoint for the message being published. In order of precedence:

  • If the destination endpoint has native message delivery capabilities, Wolverine uses that capability. Outbox mechanics still apply to when the outgoing message is released to the external endpoint’s sender. At the time of this post, the only transport with native scheduling support is Wolverine’s Azure Service Bus transport or the recently added Sql Server backed transport.
  • If the destination endpoint is durable, meaning that it’s enrolled in Wolverine’s transactional outbox, then Wolverine will store the scheduled messages in the outgoing envelope storage for later execution. In this case, Wolverine is polling for the ready to execute or deliver messages across all running Wolverine nodes. This option is durable in case of process exits.
  • In lieu of any other support, Wolverine has an in memory option that can do scheduled delivery or execution

How I started in software development

A very rare Friday blog post, but don’t worry, I didn’t exert too much energy on it.

TL;DR: I was lucky as hell, but maybe prepared well enough that I was able to seize the opportunities that did fall in my lap later

I never had a computer at home growing up, and I frankly get a little bit exasperated at developers of my generation bragging about the earliest programming language and computer they learned on as they often seem unaware of how privileged they were back in the day when home computers were far more expensive than they are now. Needless to say, no kind of computer science or MIS degree was even remotely on my radar when I started college back in the fall of ’92. I did at least start with a 386 knockoff my uncle had given me for graduation, and that certainly helped.

Based partially on the advice of one of my football coaches, I picked Mechanical Engineering for my degree right off the bat, then never really considered any kind of alternatives the rest of the way. Looking back, I can clearly recognize that my favorite course work in college was anytime we dipped into using Matlab (a very easy to use mathematics scripting language if you’ve never bumped into it) for our coursework (Fortran though, not so much).

I don’t remember how this came about, but my first engineering lead gave me a couple weeks one time to try to automate some kind of calculations we frequently did with custom Matlab scripts, which just gave me the bug to want to do that more than our actual engineering work — which was often just a ton of paperwork to satisfy formal processes. My next programming trick was playing with Office VBA to automate the creation of some of those engineering documents instead of retyping information that was already in Excel or Access into Word documents.

This was also about the time the software industry had its first .com boom and right before the first really bad bust, so a lot of us younger engineers were flirting with moving into software as an alternative. My next big step was right into what I’d now call “Shadow IT” after I purchased some early version of this book:

I devoured that book, and used MS Access to generate ASP views based on database tables and views that I reverse engineered to “learn” how to code. Using a combination of MS Access, Office VBA, and ASP “Classic”, I built a system for my engineering team to automate quite a bit of our documentation and inventory order creation that was actually halfway successful.

I think that work got the attention of our real IT organization, and I got picked up to work in project automation right at the magical time when the engineering and construction industry was moving from paper drafting and isolated software systems into connected systems with integration work. That was such a cool time because there was so much low hanging fruit and the time between kicking around an idea in a meeting and actually coding it up was pretty short. I was still primarily working with the old Microsoft DNA technologies plus Oracle databases.

While doing this, I took some formal classes at night to try to get the old Microsoft MCSD certification (I never finished that) where I added VB6 and Sql Server to my repertoire.

My next big break was moving to Austin in 2000 to work for a certain large computer manufacturer. I came in right as a big consulting company was finishing up a big initiative around supply chain automation that didn’t really turn out the way everybody wanted. I don’t remember doing too much at first (a little Perl of all things), but I was taking a lot of notes about how I’d try to rebuild one of the failing systems from that initiative — mostly as a learning experience for myself.

I think I’d managed to have a decent relationship with the part of the business folks who were in charge of automation strategy, and at the point where they were beside themselves with frustration about the current state of things, I happened to have a new approach ready to go. In an almost parting of the Red Sea kind of effect, the business and my management let me run on a proof of concept rewrite. For the first and only time in my career, I had almost unlimited collaboration with the business domain experts, and got the basics in place fast and sold them on the direction. From there, my management at the time did an amazing job of organizing a team around that initiative and fighting off all the other competing groups in our department that tried to crash the party (I didn’t really learn to appreciate what my leadership did to enable me until years later, but I certainly do now).

Long story short, the project was a big success in terms of business value (the code itself was built on old Windows DNA technology, some Java, Oracle and was unnecessarily complicated in a way that I’d call it completely unacceptable now). I never quite reached that level of success there again, but did get bumped up in title to an “architect” role before I left for a real software consultancy.

I also at least started working with very early .NET for a big proof of concept that never got off the ground, and that helped launch me into my next job with ThoughtWorks where I got my first grounding in Agile software development and more disciplined ways of building systems.

Some time soon, there’ll be an episode up of the Azure DevOps podcast that Jeffrey Palermo and I recorded recently. Jeffrey asked me something to the effect of what my formative experiences were that set me on my career path. I told him that my real acceleration into being a “real” software developer was my brief time at ThoughtWorks during some of the heady eXtreme Programming (XP) days (before Scrum ruined Agile development). That’s where I was at when I started and first published StructureMap that lasted for almost 15 years of active development. I think the OSS work has helped (and also hurt) my career path. I probably derived much more career benefit from writing technical content for the now defunct CodeBetter.com website where I learned to communicate ideas better and participated in the early marriage of Agile software practices and .NET technologies.

Anyway, that’s how I managed to get started. Looking back, I’d just say that it’s all about making the best of your early work situations to learn so that you can seize the day when opportunities come later. It’d probably also help if you were way better at networking than I was in my early career too though, but I don’t have any real advice on that one:-)

Plans for Marten V7 and Beyond

As you might know, the Marten core team is in the process of building a new business around the “Critter Stack” tools (Marten + Wolverine and a couple smaller things). I think we’ll shortly be able to offer formal paid support contracts through JasperFx Software, and we’re absolutely open for business for any kind of immediate consulting on your software initiatives.

Call this a follow up from the Critter Stack roadmap from back in March. Everything takes longer than you wish it would, but at least Wolverine went 1.0 and I’m happy with how that’s been received so far and its uptake.

In the immediate future, we’re kicking out a Marten 6.1 release with a new health check integration and some bug fixes. Shortly afterward, we hope to get another 6.1.1 release out with as many bug fixes as we can address quickly to clear the way for the next big release. With that out of the way, let’s get on to the big initiatives for Marten!

Marten 7 Roadmap

Marten 6 was a lot of bug fixing and accommodating the latest version of Npgsql, our dependency for low level communication with PostgreSQL. Marten 7 is us getting on track for our strategic initiatives. Right now the goal is to move to an “open core” model for Marten where the current library and its capabilities stay open and free, but we will be building more advanced features for bigger workloads in commercial add on projects.

For the open core part of Marten, we’re aiming for:

  • Significant improvements to the LINQ provider support for better performing SQL and knocking down an uncomfortably long list of backlogged LINQ related issues and user requests. You can read more about that in Marten Linq Provider Improvements. Honestly, I think this is likely more work than the rest of the issues combined.
  • Maybe adding Strong Typed Identifiers as a logical follow on to the LINQ improvements. It’s been a frequent request, and I can see some significant opportunities for integration with Wolverine later
  • First class subscriptions in the event sourcing. This is going to be simplistic model for you to build your own persistent subscriptions to Marten events that’s a little more performant and robust than the current “IProjection for subscriptions” approach. More on this in the next section.
  • A way to parallelize the asynchronous projections in Marten for improved scalability based on Oskar’s strategy described in Scaling Marten.
  • .NET 8 integration. No idea what if anything that’s going to do to us.
  • Incorporating Npgsql 8. Also no idea if that’s going to be full of unwanted surprises or a walk in the park yet
  • A lightweight option for partial updates of Marten documents. We support this through our PLv8 add on, but that’s likely being deprecated and this comes up quite a bit from people moving to Marten from MongoDb

Critter Stack Enterprise-y Edition

Now, for the fun part, the long planned, long dreamed of commercial add ons for true enterprise Critter Stack usage. We have initial plans to build an all new library using both Marten and Wolverine that will be available under a commercial subscription.

Projection Scalability

Most of the biggest issues with scaling Marten to bigger systems are related to the asynchronous projection support. The first goal is scalability through distributing projection work across all the running nodes within your application. Wolverine already has leader election and “agent assignment” functionality that was built with this specific need in mind. To make that a little more clear, let’s say that you’re using Marten with a database per tenant multi-tenancy strategy. With “Critter Stack Enterprise” (place holder until we get a better name), the projection work might be distributed across nodes by tenant something like this:

The “leader agent” would help redistribute work as nodes come online or offline.

Improving scalability by distributing load across nodes is a big step, but there’s more tricks to play with projection throughput that would be part of this work.

Zero Downtime, Blue/Green Deployments

With the new projection daemon alternative, we will also be introducing a new “blue/green deployment” scheme where you will be able to change existing projections, introduce all new projections, or introduce new event signatures without having to have a potentially long downtime for rebuilding projections the way you might have to with Marten today. I feel like we have some solid ideas for how to finally pull this off.

More Robust Subscription Recipes

I don’t have many specifics here, but I think there’s an opportunity to also support more robust subscription offerings out of the Marten events using existing or new Wolverine capabilities. I also think we can offer stricter ordering and delivery guarantees with the Marten + Wolverine combination than we ever could with Marten alone. And frankly, I think we can do something more robust than what our obvious competitor tools do today.

Additional Event Store Throughput Improvements

Some other ideas we’re kicking around:

  • Introduce 2nd level caching into the aggregation projections
  • Elastic scalability for rebuilding projections
  • Hot/cold event store archiving that could improve both performance and scalability
  • Optional usage of higher performance serializers in the event store. That mostly knocks out LINQ querying for the event data

Other Stuff

We have many more ideas, but I think that the biggest theme is going to be ratcheting up the scalability of the event sourcing functionality and CQRS usage in general. There’s also a possibility of taking Marten’s event store functionality into cross-platform usage this year as well.

Thoughts? Requests? Wanna run jump in line to hire JasperFx Software?

Marten Linq Provider Improvements

A couple years ago I was in a small custom software development shop in Austin as “the .NET guy” for the company. The “Java guy” in the company asked me one day to try to name one think about .NET that he could look at that wasn’t just a copy of something older in the JVM. I almost immediately said for him to look at LINQ (Language INtegrated Query for non .NET folks who might stumble into this), as there isn’t really a one for one equivalent and I’d argue that LINQ is a real advantage within the .NET space.

As the author and primary support person for Marten’s LINQ provider support though, I have a decidedly mixed view of LINQ. It’s undoubtedly a powerful tool for .NET developers, but it’s maybe my least favorite thing to support in my entire OSS purview as a LINQ provider is a permutation hell kind of problem. To put it in perspective, I start making oodles of references to Through the Looking Glass anytime I have to spend some significant amount of time dealing with our LINQ support.

Nevertheless, Marten has an uncomfortably large backlog of LINQ related issues and we had a generous GitHub sponsorship to specifically improve the efficiency of the SQL generated for child collection queries in Marten, so I’ve been working on and off for a couple months to do a complete overhaul of our LINQ support that will land in Marten 7.0 sometime in the next couple months. Just in the last week I finally had a couple breakthroughs I’m ready to share. First though, let’s all get in the right headspace with some psychedelic music:

RIP Tom Petty!

and

And I’m going w/ Grace Potter’s cover version!

Alright, so back to the real problem. When Marten today encounters a LINQ query like this one:

        var results = theSession.Query<Top>().Where(x =>
            x.Middles.Any(m => m.Color == Colors.Green && m.Bottoms.Any(b => b.Name == "Bill")));

Marten generates a really fugly SQL query using PostgreSQL Common Table Expressions to explode out the child collections into flat rows that can then be filtered to matching child rows, then finally uses a sub query filter on the original table to find the right rows. To translate, all that mumbo jumbo I said translates to “a big ass, slow query that doesn’t allow PostgreSQL to utilize its fancy GIN index support for faster JSONB querying.”

The Marten v7 support will be smart enough to “know” when it can generate more efficient SQL for certain child collection filtering. In the case above, Marten v7 can use the PostgreSQL containment operator to utilize the GIN indexing support and just be simpler in general with SQL like this:

select d.id, d.data from public.mt_doc_top as d where CAST(d.data ->> 'Middles' as jsonb) @> :p0 LIMIT :p1
  p0: [{"Color":2,"Bottoms":[{"Name":"Bill"}]}]
  p1: 2

You might have to take my word for it right now that the SQL above is significantly more efficient than the previous LINQ support.

One more sample that I’m especially proud of. Let’s say you use this LINQ query:

        var result = await theSession
            .Query<Root>()
            .Where(r => r.ChildsLevel1.Count(c1 => c1.Name == "child-1.1") == 1)
            .ToListAsync();

This one’s a little more complicated because you need to do a test of the *number* of matching child elements within a child collection. Again, Marten vCurrent will use a nasty and not terribly efficient common table expression approach to give you the right data. For Marten v7, we specifically asked the Marten user base if we could abandon support for any PostgreSQL versions lower than PostgreSQL 12. *That* is letting us use PostgreSQL’s JSONPath query support within our LINQ provider and gets us to this SQL for the LINQ query from up above:

select d.id, d.data from public.mt_doc_root as d where jsonb_array_length(jsonb_path_query_array(d.data, '$.ChildsLevel1[*] ? (@.Name == $val1)', :p0)) = :p1
  p0: {"val1":"child-1.1"}
  p1: 1

It’s still quite a bit away, but the point of this post is that there is some significant improvements coming to Marten’s LINQ provider soon. More importantly to me, finishing this work up and knocking out the slew of open LINQ related GitHub issues will allow the Marten core team to focus on much more exciting new functionality in the event sourcing side of things.